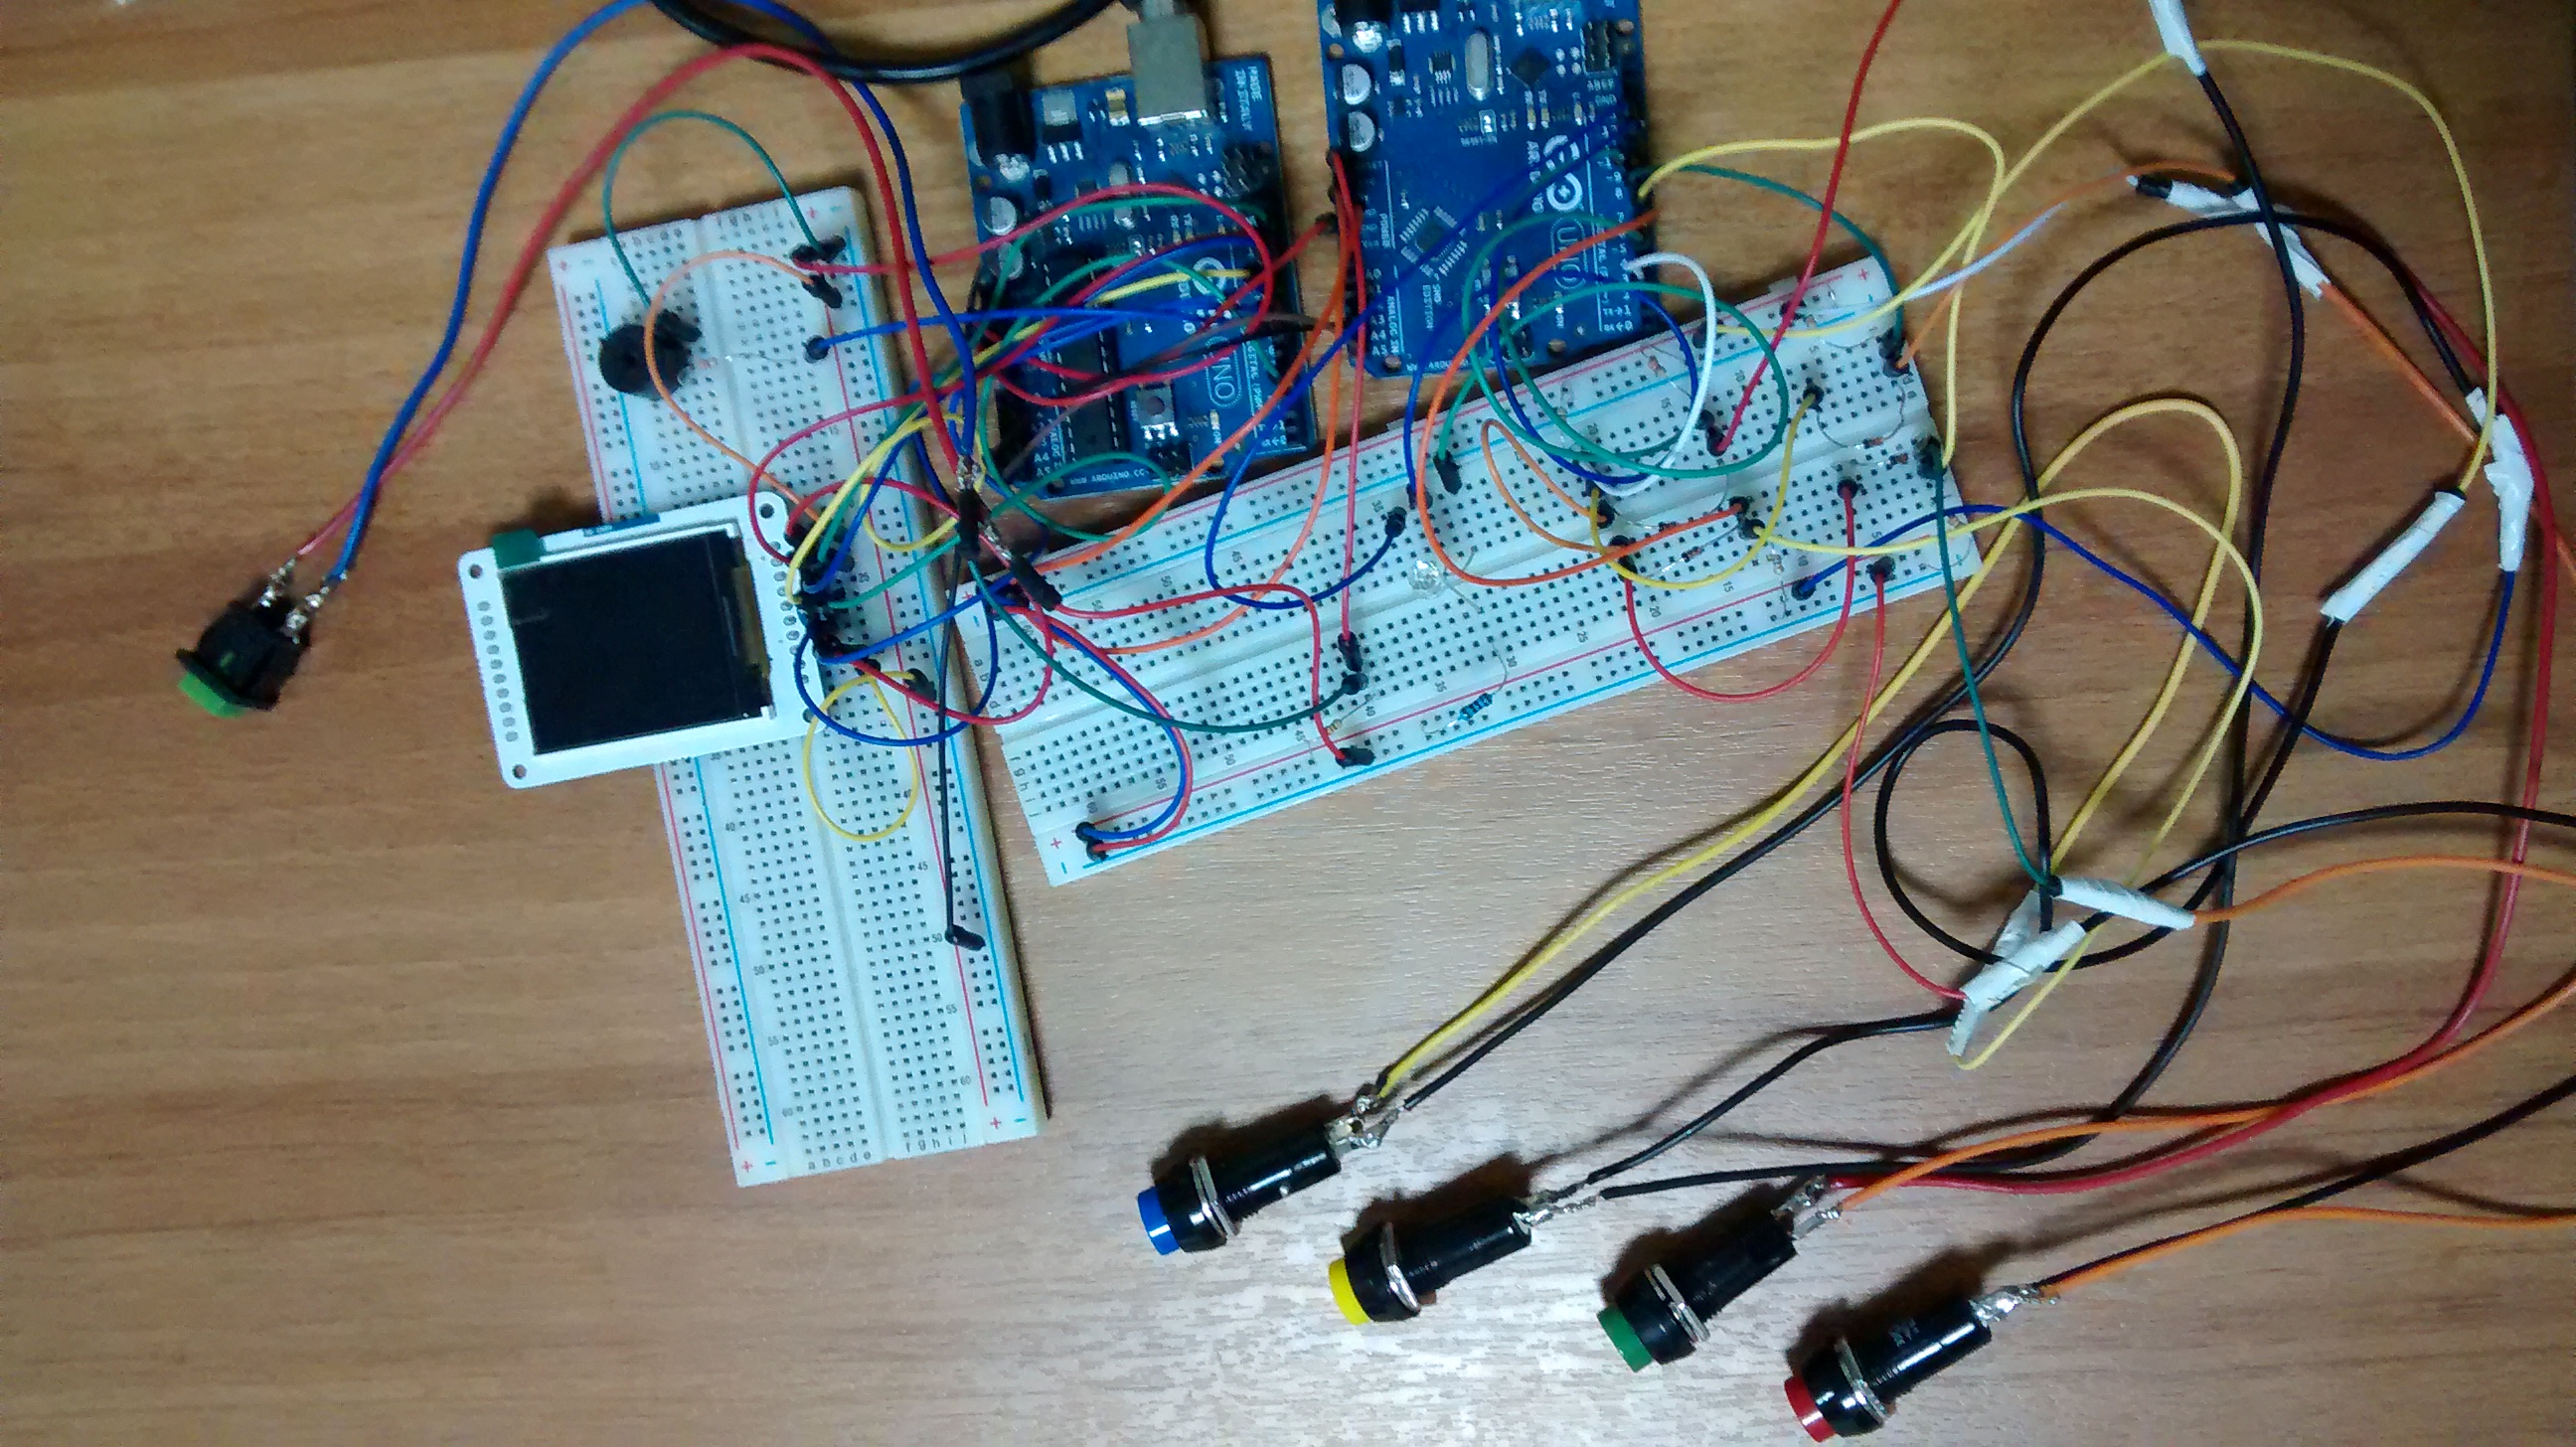
Overview of Lightgame where all the components are shown.
Development Team :
Efstathios Lymperidis
Thodoris Bais
Supervision :
Dr. Minas Dasygenis
Lightgame was made as a semester project for the course Embedded Systems of the University of western Macedonia, Department of Informatics and Telecommunications engineering.
Introduction
Lightgame is a reaction game designed for four players. Each player has a button with one of the colors red, green, blue and yellow. At each round an RGB LED will light randomly one of those colors. If the player with the corresponding color presses their button, their score will be their reaction time in milliseconds. If the wrong player presses their button they will get a penalty equal to their reaction time multiplied by 2. In the end of the game each player’s score will be the sum of their reaction times and penalties. So the player with the lower score is the winner.
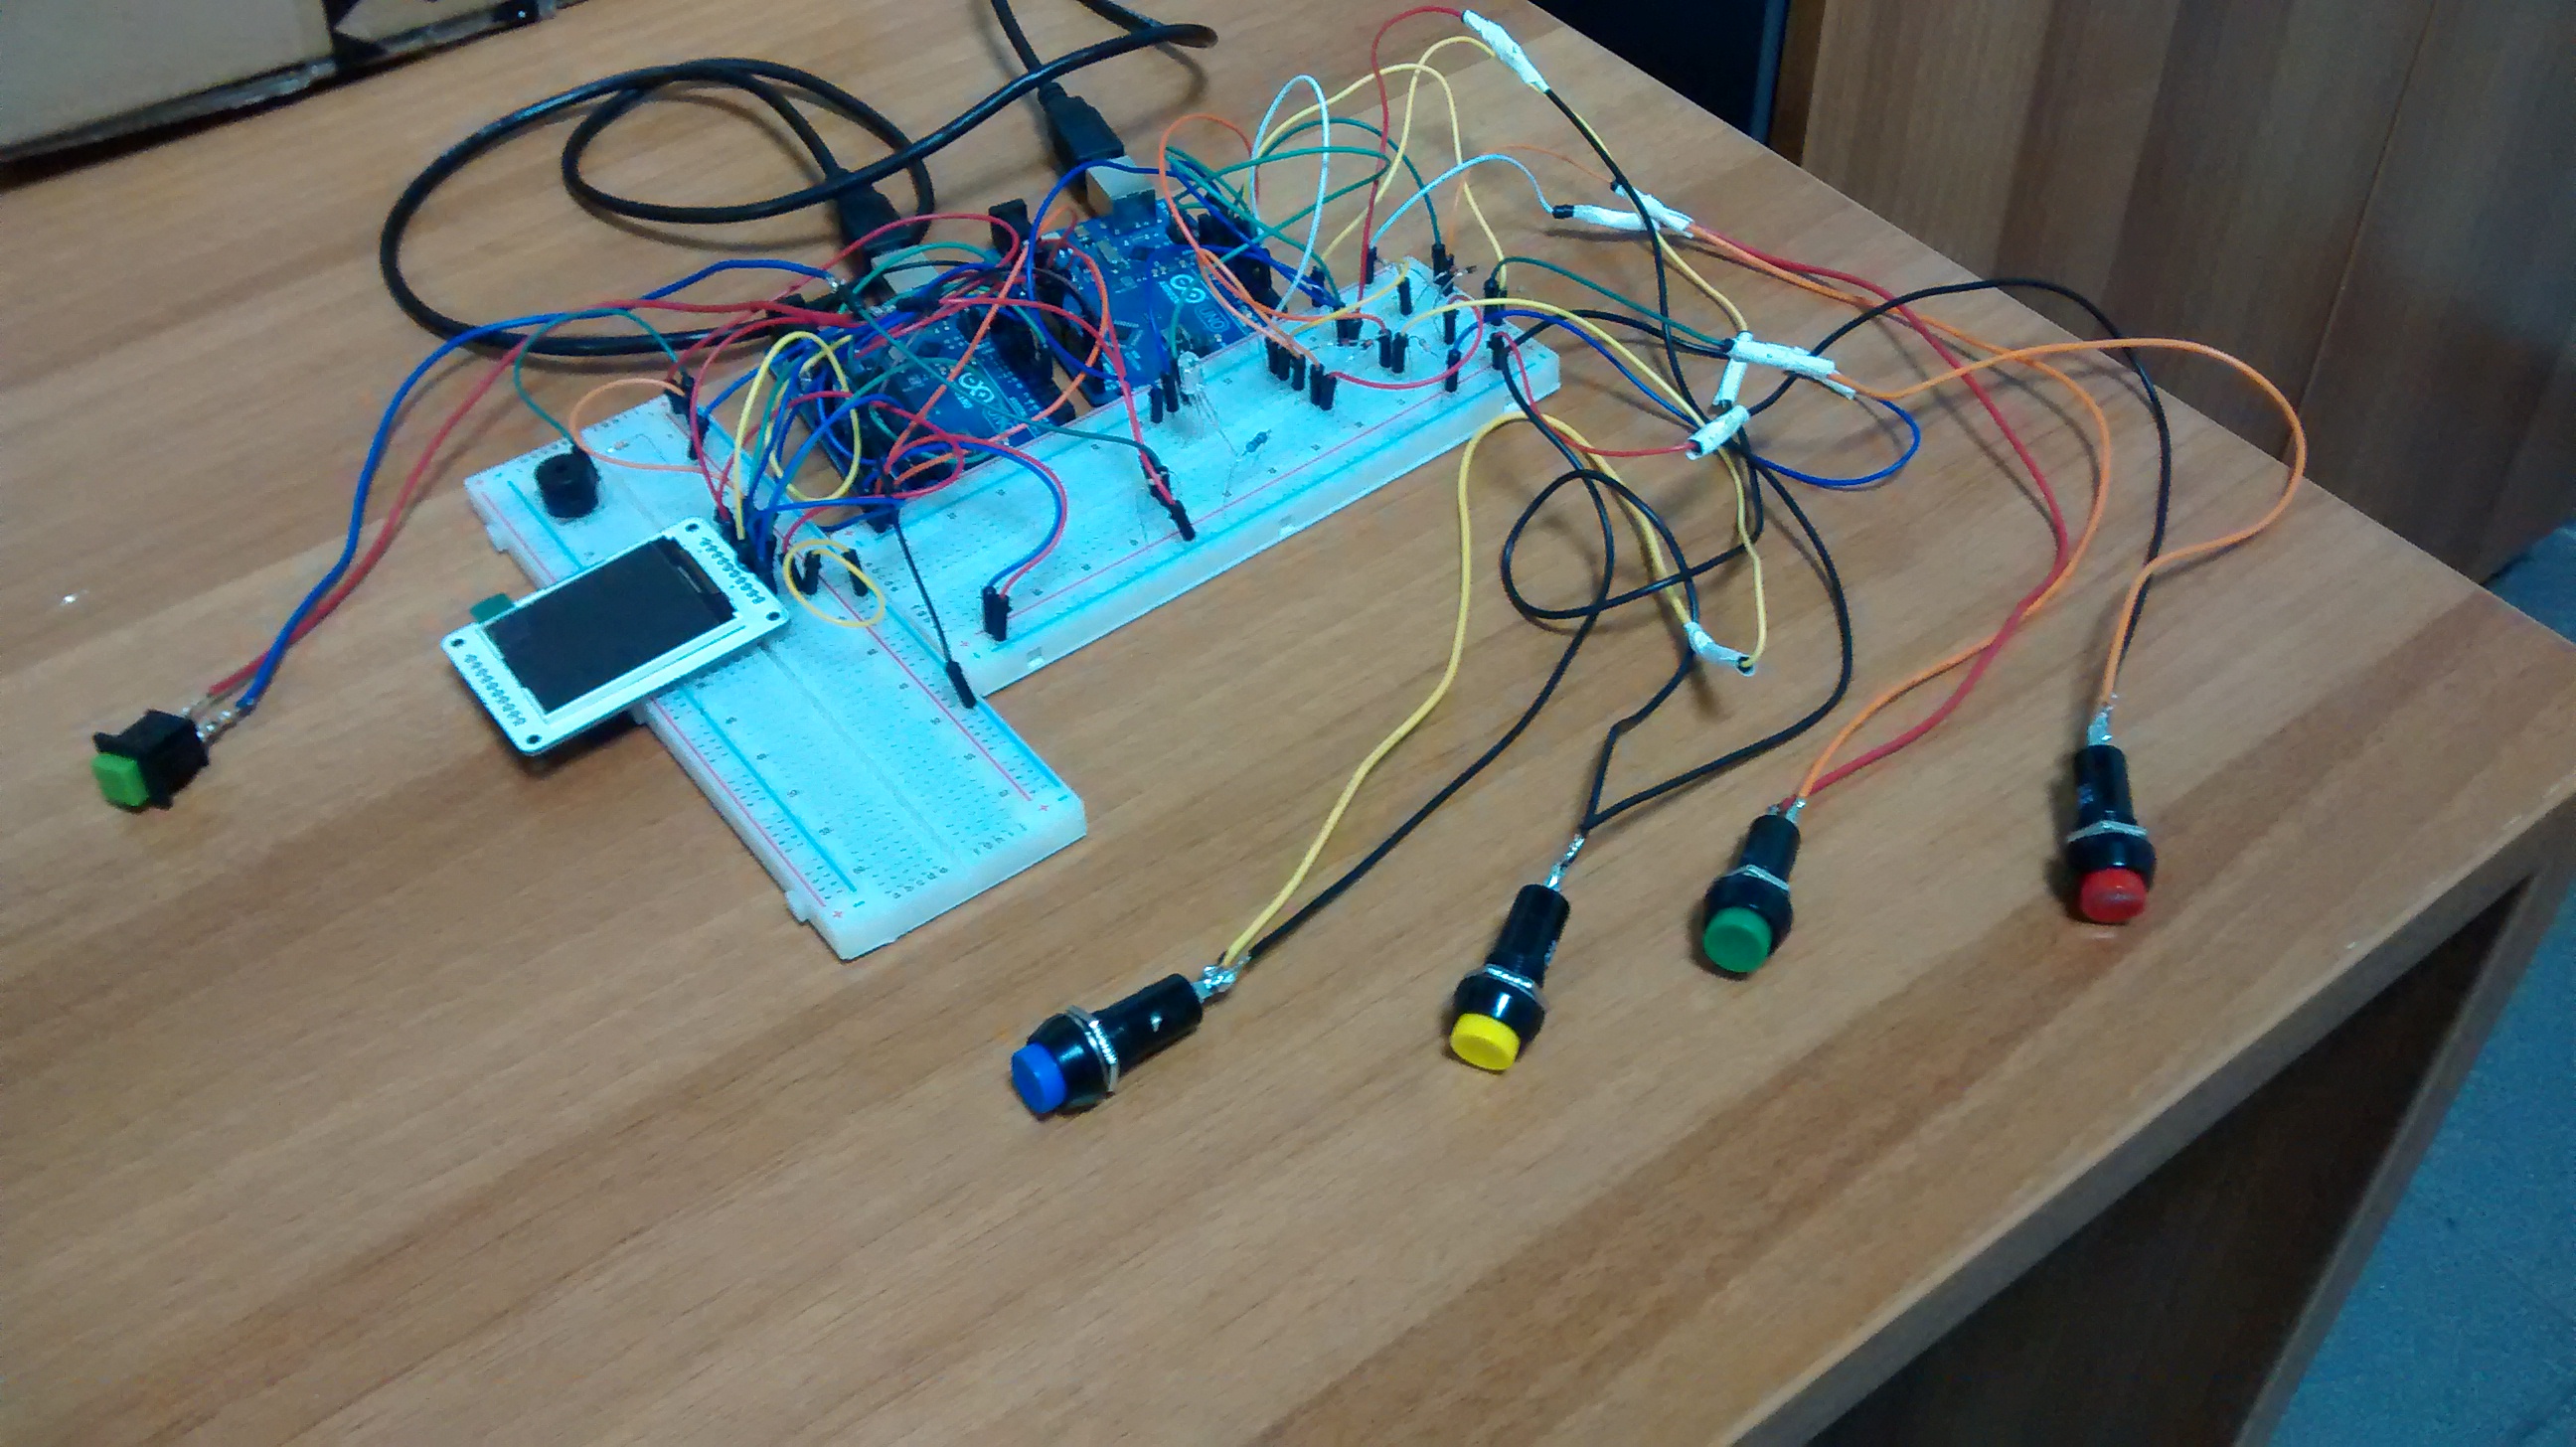
At the left side there is the Slave arduino with it's components and at the right side,
the Master arduino responsible for the buttons and calculations.
Design
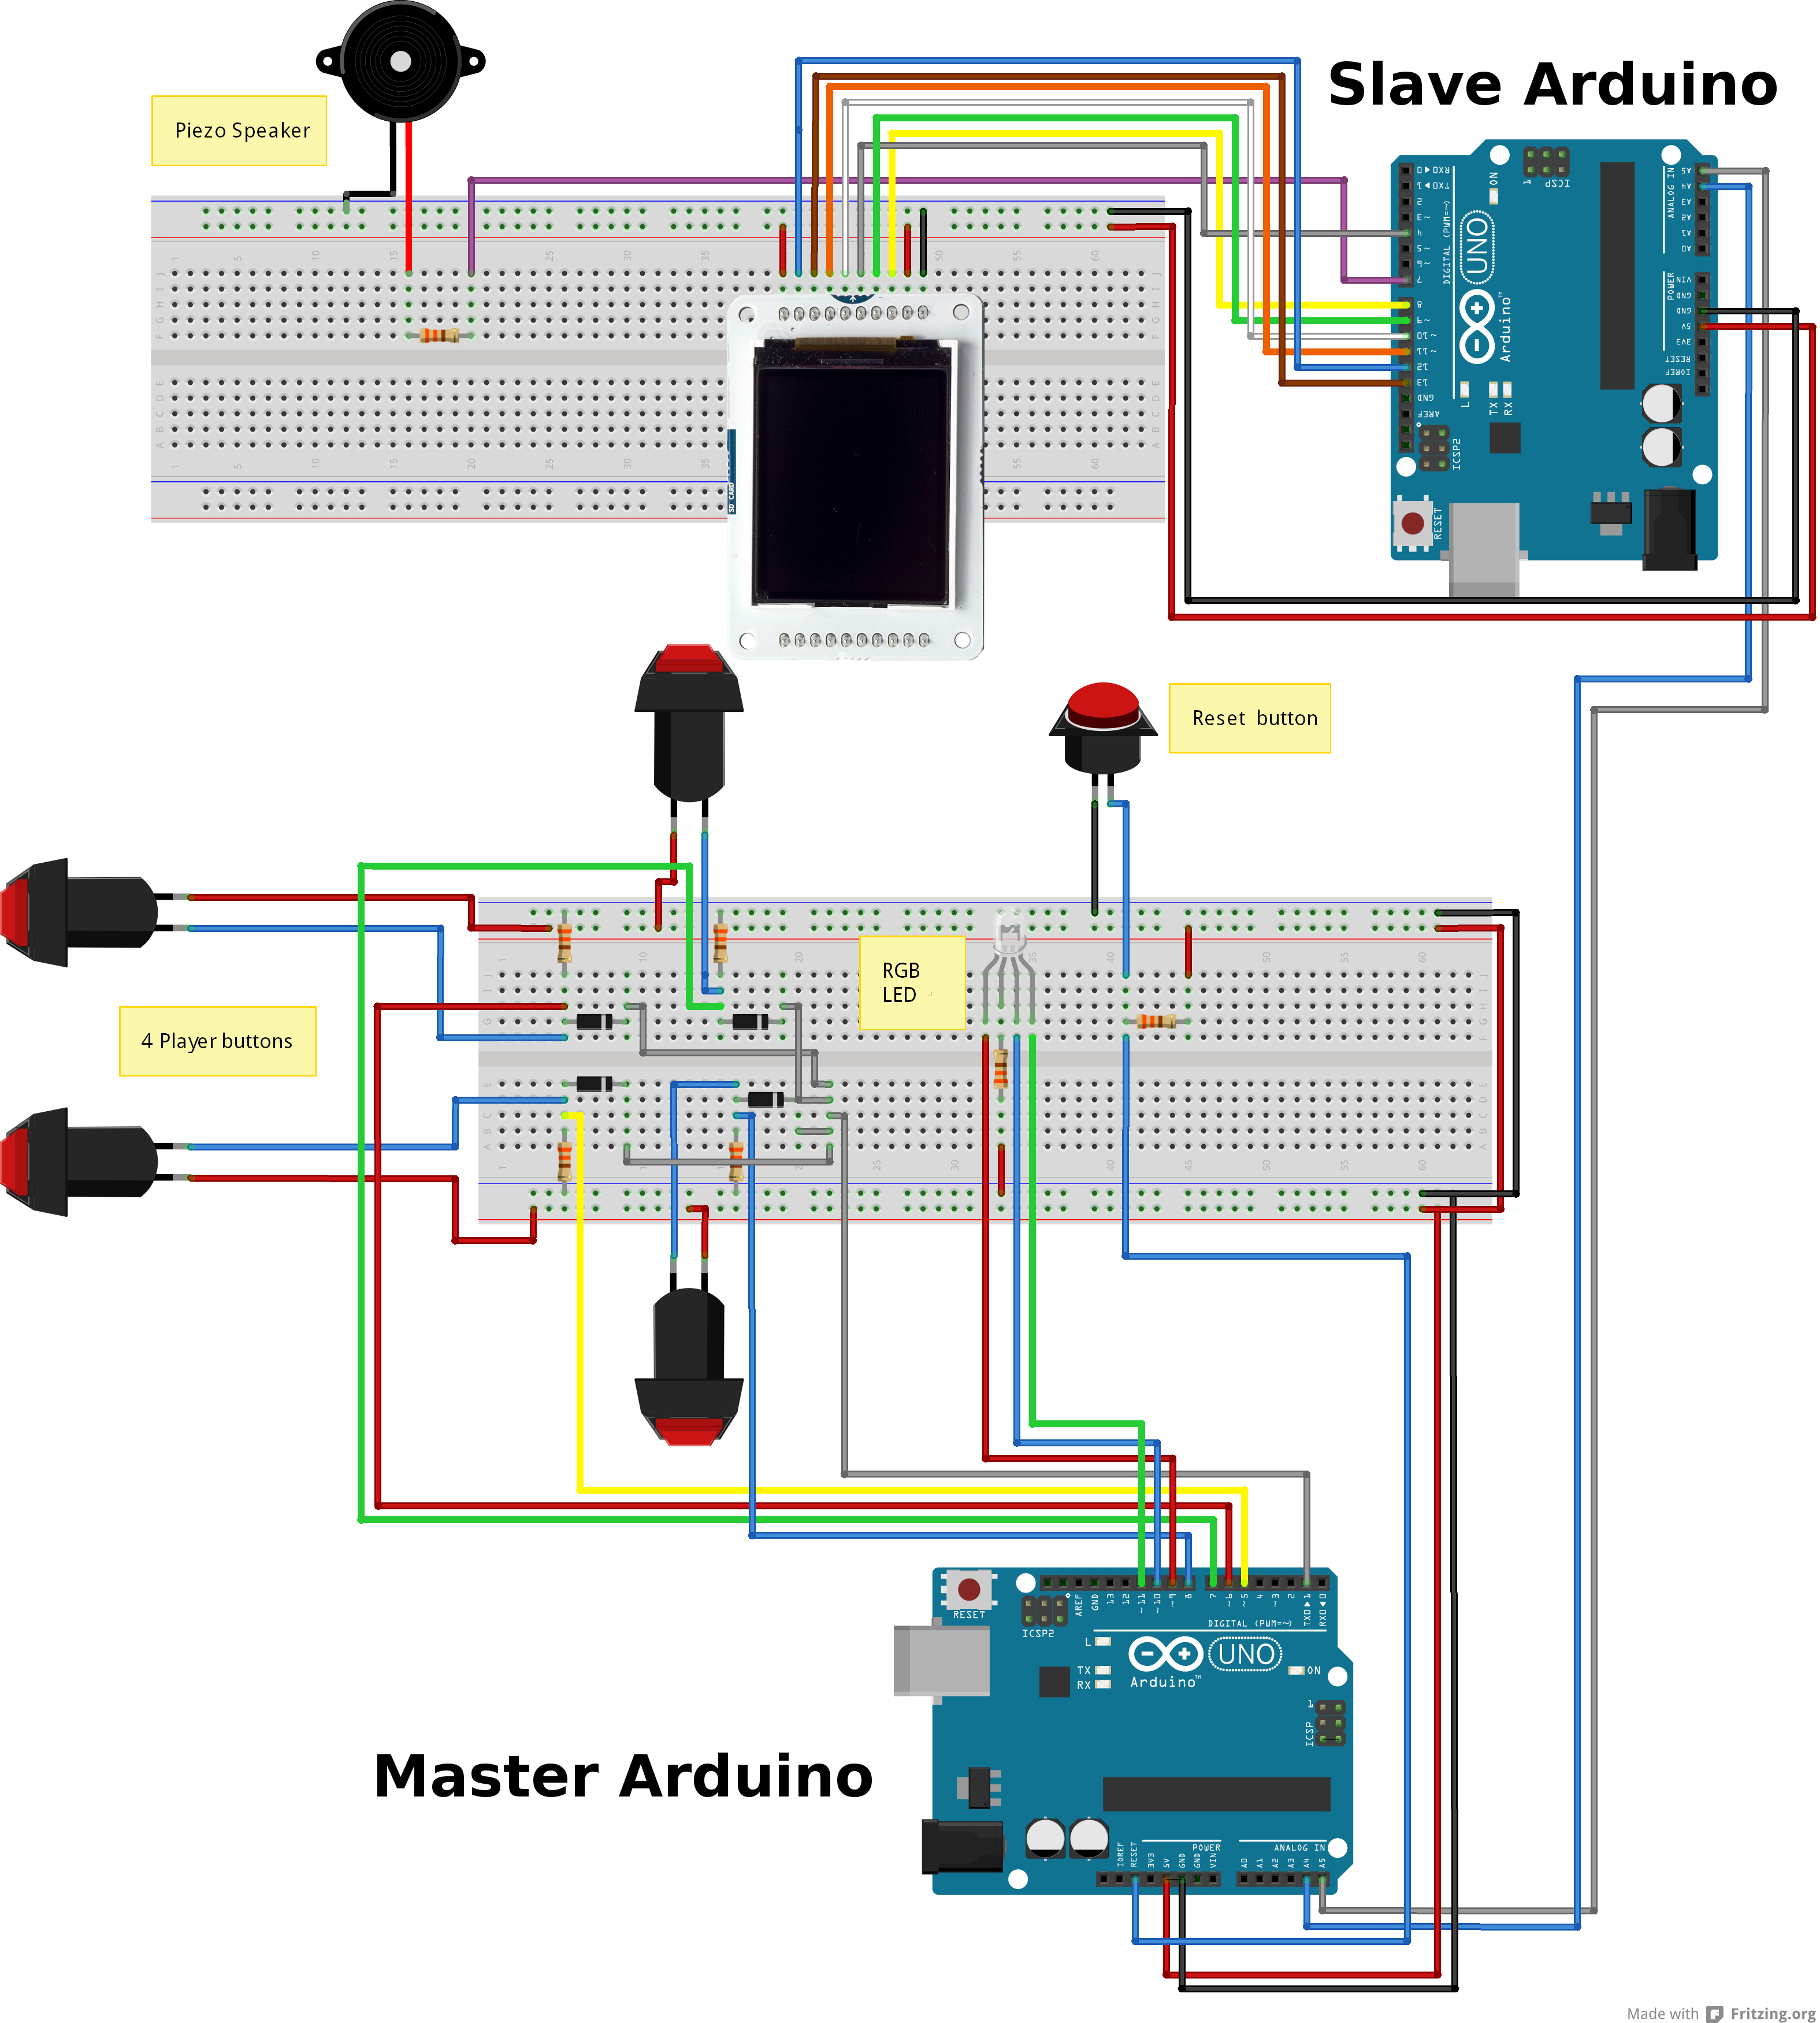
The game is developed using two Arduino devices connected in a Master - Slave configuration via the I2C synchronous serial protocol. The Master Arduino is responsible for handling the buttons, displaying the correct rgb colors, doing all the calculations for the score and stages of the game. The Slave or Peripherals Arduino is responsible for displaying in a TFT LCD screen the right messages and playing the appropriate music using a buzzer based on the commands it has received from the Master Arduino.
Stage 1 : Start of the game
The game works on stages which are managed by the Master Arduino. When the game begins, the game is in the first stage where the Master Arduino is initializing the score values, makes sure the RGB LED doesn’t display any colors and sends the command to the Slave arduino in order to display a game starting message and play an intro music. At this stage the player buttons are locked and will be ignored if pressed.
Stage 2 : The turns
In the second stage, the game begins. At this stage the Master Arduino will send the command to the Slave arduino to display a message for a new round and play a music to alert the players, select a random color between the available ones, start a timer using the StopWatch library to count the score, allow the player buttons to be pressed and light the RGB LED. The colors, although they are randomly selected, are also made sure to allow each player to have a turn every four rounds. Once the RGB LED has light a color, the program will continue in a loop waiting to a player to press their button, this loop will last for a few seconds.
When a player button is pressed, an interrupt will be called in which we will check if the player buttons are allowed to be pressed, wether the right or a wrong button is pressed, calculate and add the reaction time to the player’s score and inform a volatile variable that the correct or a wrong button was pressed. Using this variable, the loop will end, the timer will stop and the RGB LED will turn off. Then the Master Arduino will send to the Slave Arduino the corresponding command to play a win or lose sound and display the updated score of the player who pressed their button.
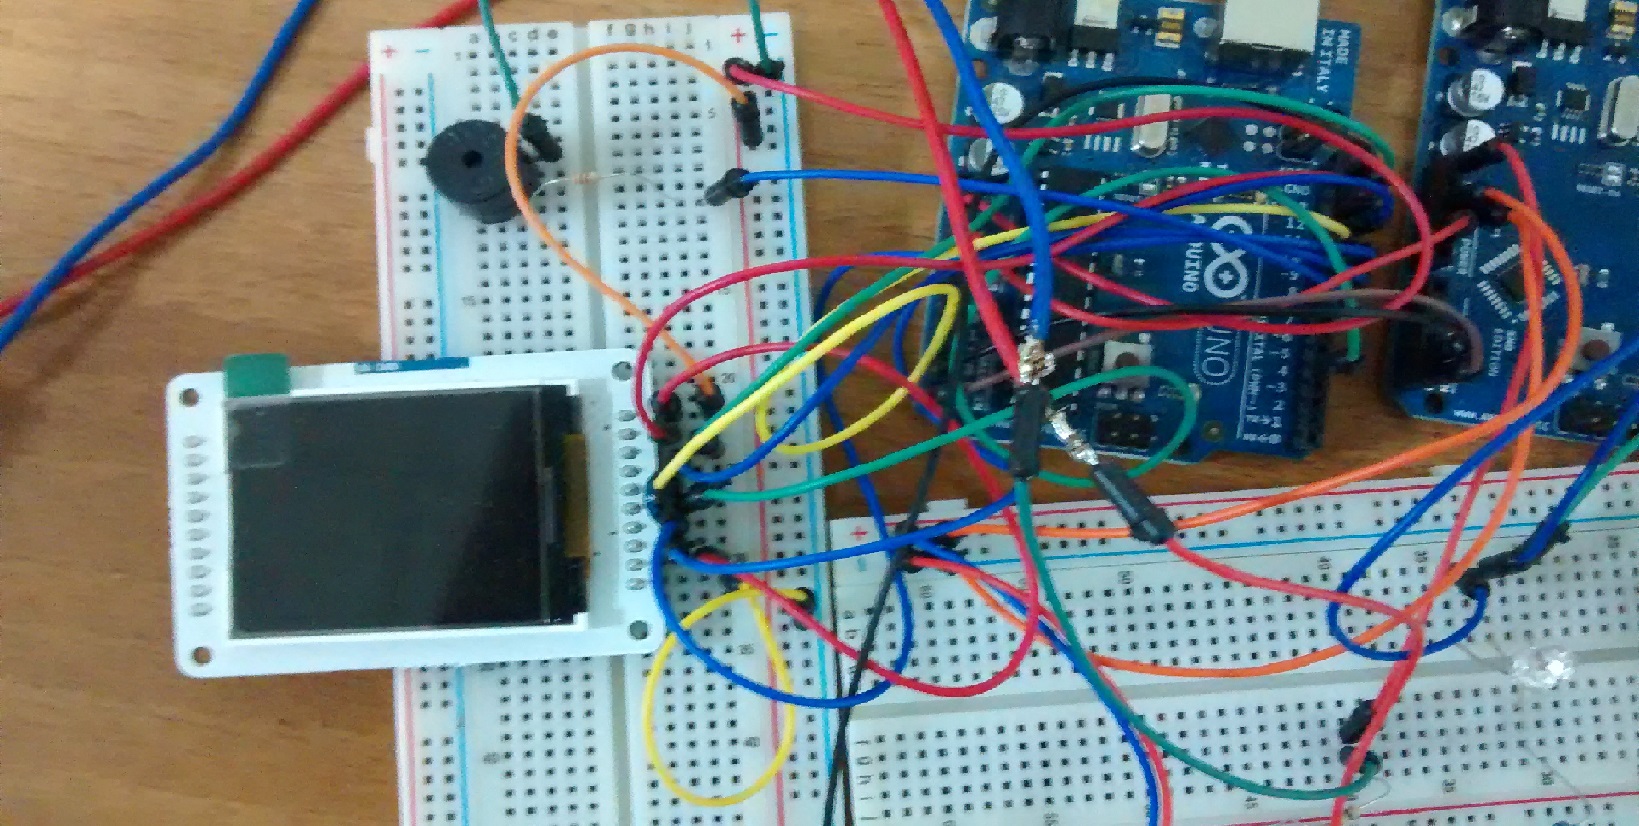
A closer look at the screen and buzzer on the left and the RGB LED on the right.
Stage 3 : Game over
Once the turns are over, there is the third stage of the game where the Master Arduino sends to the Slave Arduino the command to display all the scores and play a game over music. At this stage the player buttons are ignored and any of the players can use the reset button to reset the game.
Demonstration Video
Aruino Source Code
The source code is freely distributed under apache 2 licence.
Master Arduino Code :
Codebender
Local Mirror
Slave Arduino Code :
Codebender
Local Mirror
Lightgame Project
A multiplayer response game developed in arduino
Lightgame Schematic
Bill of Materials
( The listed prices are based on a greek distributor. )
| Component | Quantity | Unit Cost | Cost |
|---|---|---|---|
| Arduino Uno Rev3 | 2 | € 24.60 | € 49.20 |
| Breadboard 830 Tie Point | 2 | € 5.50 | € 11.00 |
| Arduino TFT LCD Screen | 1 | € 24.60 | € 24.60 |
| Buzzer 5V | 1 | € 0.50 | € 0.50 |
| Push Button Monostable Blue | 1 | € 0.55 | € 0.55 |
| Push Button Monostable Red | 1 | € 0.55 | € 0.55 |
| Push Button Monostable Green | 1 | € 0.55 | € 0.55 |
| Push Button Monostable Yellow | 1 | € 0.55 | € 0.55 |
| Push Button Square 11x13 | 1 | € 0.55 | € 0.55 |
| Led Transparent 5mm RGB ( common anode ) | 1 | € 0.60 | € 0.60 |
| Resistor 1/4W Carbon 5% ( 330 ohm ) | 7 | € 0.01 | € 0.10 |
| Diode 1N4148 | 4 | € 0.02 | € 0.08 |
| Jumper Wires Standard 7" M/M Pack of 30 | 2 | € 4.29 | € 4.29 |
| Cable USB A to B - 1.8m | 2 | € 1.50 | € 3.00 |
| Total Cost | € 96.12 |